Showing posts with label ZombieStrike. Show all posts

Saturday, February 13, 2016

Nerf Zombie Strike Crossfire

Nerf Zombie Strike Crossfire

Hasbro seems to have finally acknowledged the foremost authority on zombie-fighting: AMC's The Walking Dead. In the apocalyptic television show, currently in its sixth season, a main character wields a crossbow against the zombie hordes. And now you can too! Nerf's version is called the Crossfire, and although it's not strictly a crossbow, it has some really cool crossbow styling.

Who wouldn't love that silhouette?
Even better, it looks really sci-fi without the crossbow arms. Since it is fully capable of function with or without the crosspiece attached, you get two choices for what you want your Crossfire to look like -- sci-fi sidearm, or Walking Dead wannabe.

Space-gun vs. zombies.


Good:
  • Looks. This is a SWEEEET shell for a nerf gun. It would also make for some awesome cosmetic mods, due to the fact that the shell comes apart into several separate pieces. And that amazing hand-guard, too!
  • Sling mounts. You may not want to use a sling with the Crossfire if you use it as a crossbow, but if you've ditched the bow arms, it might be a great candidate. After all, it has two convenient points to attach a sling.
  • Handle size. It may look slightly cramped, but it was "just about perfect" for several test subjects who all had different sizes of hands.
  • No "cloth wrap".  I rather dislike the fake cloth wrap that is so prevalent in the Zombie Strike line, so I'm happy that the Crossfire doesn't have it.
  • Ranges. I was unable to test this particular model, but generally Crossfires do get about 75-90 feet, typical elite ranges.
  • Snappy performance. The prime is simple, short, and snappy.
  • No locks. I couldn't believe this one, even after playing with it for a while. So I took it apart to check and there are NO LOCKS ANYWHERE! It's just a simple catch-and-release system.

Bad:
  • Trigger. It needs some lubrication; it feels rather sticky.
  • Handle. It's comfy and grippy, but not quite ergonomic. And since the gun is heavily balanced toward the front, this can be quite a problem.
  • Priming handle. To be frank, it's just too small. It's difficult to grab onto. In addition, it's attached to the plunger mech in an inherently weak way, which means it might break if you even slightly increased the spring load.
  • Stock attachment. To date, this is the only Zombie strike gun that features this. And it looks really cool with a stock attached. Which is sad, because the attachment point has a very loose fit, making it almost useless. And I got my hopes up, too!
  • Capacity. It only holds four darts. Then again, who actually buys this gun to have a practical foam-flinging weapon? So capacity's no big issue.


The Crossfire may not be a practical primary or sidearm because of its limited rate of fire and capacity. And it's risky to modify it because of the priming system. But that doesn't mean it's not a fun, cool-looking toy. And it's got reliable, snappy performance, meaning it'll be a blast to play with. (Get it?)

Stare that down, if you dare.   No really, I dare you.

        ,,,,..
[˘˘˘˘7º''''''''''''''''''''


One final note: Hasbro's quality control team seems to be slipping up. I have found several minor flaws and blemishes in recent guns I've bought, ranging from a slightly botched paint job to a very crooked dart. And a Nerf YouTuber whom I follow recently reviewed a new blaster that broke the first time he used it. So just look closely before you buy.

Saturday, January 02, 2016

MOD: Nerf Hammershot - Let the Zombie-Slaying Begin!

The Mad Hammer
The Mad Hammer!

Introducing the post-apocolyptic dream weapon: The Mad Hammer!

And yes, the cloth wrap is finally a reality.


The Mad Hammer is, at its core, just a Hammershot like any other Hammershot. It's the cosmetics that set it apart.


The first thing I did was take some gravel, 60-grit sandpaper, and other sharp and/or rough things, and scratched it up. This served two purposes: 1) to remove some of the paint and the "shiny new" look, and 2) provided a nice base for the battle-damaged look soon to come.

After removing the gleam, I got down and dirty to give it "battlefield experience".  DO NOT try this at home without an adult's supervision.
I lit the gun on fire.
I selected several points that I wanted to look as though they had made actual contact with a bullet or piece of shrapnel, then held a match up to each spot till it had its own flame, then quickly and thoroughly put it out. The effect it had was sooty and visibly deformed, as though it had been hit by a fast-moving projectile.

After that, I took a silver Sharpie marker and went over most of the corners, edges, and "damaged" spots to make it look as though some of the paint had worn off, leaving bare metal showing through.
May the zombies cower
to see this power!

Finally, I wrapped camouflage paracord around the holes in the front of the gun, cut up an old, stained green rag, and wrapped it thoroughly around the handle for a comfier, grippier, and more awesome-looking handgrip.

Oh, and yes; I added my signature crosshairs to the left side in black Sharpie.


So there you have it folks! The inside scoop on the famous revolver we've come to know and love as The Mad Hammer! And remember, you heard it here first on The Tacticool Nerfer!

        ,,,,..
[˘˘˘˘7º''''''''''''''''''''

Sunday, December 13, 2015

Merry Christmas!


Merry Christmas from
the Tacticool Nerfer!
Merry Christmas from the Tacticool Nerfer!

NEWS FLASH:
Nerf Darts caught in unnatural holiday positions! Who could be responsible for this?

In the spirit of the season, you my devoted readers get a special post dedicated entirely to Christmas! Well, that's not entirely true. It wouldn't be on my blog if it didn't also pertain to Nerf. Hence the dart-Christmas-tree, the dart-stocking, and the dart-wreath (which has been modified to be my signature crosshairs).

Merry Christmas from the Tacticool Nerfer!


Since I'm going to take a break for Christmas shopping, decorating, and family time, this will be my last post till the New Year. So that means you guys and gals get a break, too. Take advantage of it! "Chill with the Fam", eat lots of turkey, mashed potatoes, and plum pudding, and play lots of Nerf.

Remember to stay on the nice list, because Santa's watching! Good girls and boys get good presents, whereas bad girls and boys get bad presents. Like the N-Strike Deploy. Santa decided that this year, instead of coal, he's going to give Deploys to naughty children. Yeah, Deploys are that bad.

Anyway, enjoy your Christmas!

        ,,,,..
[˘˘˘˘7º''''''''''''''''''''


Because I can. It's MY blog, after all…        <|:-)


Saturday, December 05, 2015

Nerf Longshot CS-12

Zombie Strike Longshot CS-12
The repaint isn't the only thing updated in this re-release of the Longshot, originally seen in 2006 as the yellow N-Strike Longshot CS-6. Hasbro originally touted it as their longest gun yet, a sniper-rifle of sorts. They discontinued it soon after, since $35.00 - $40.00 was apparently more than most people were willing to spend at that time on an "oversized" toy. But when modders discovered that it actually had monstrous firepower capability, demand spiked for the somewhat hard-to-find Longshot. It became a sought-after status symbol, an HvZ staple. In late 2014, Hasbro noticed that supplies were running low among the Nerf Nation, so they re-released it under the Zombie Strike Z.E.D. Squad sub-series.

The hopes:
When the Nerfing community heard that the Longshot was coming back, the forums and YouTube channels exploded with speculation and glee. Since the N-Strike Elite line had repainted and improved previous N-Strike guns and Zombie Strike was, loosely speaking, a sub-series of Elite, many assumed that the internals would be significantly upgraded. Some speculated that it would come with a new, different barrel extension. A few even thought Hasbro might remove the AR for us. A far-out hope, but still a pretty cool thought.

The reality:
Ummm… Yeah.
Ugly.
Sorry, folks. Hasbro clearly acknowledged that modders are capable of modding the Longshot on their own. They left it exactly the same inside, and on the outside they just repainted it. And removed the frontgun. :( At least they gave us a more capacious clip. But they took away the bipod, leaving an ugly and uncomfortable… thing. What would you call that exactly?


Now for the pros/cons.
Good:
  • Performance. Hasbro chose not to upgrade it for a reason- they probably couldn't have done so without breaking some sort of regulation. When shooting Elite or Zombie Strike darts, even the original Longshot can outshoot most Elite guns.
  • Scope. If you look up "Nerf" on Ebay, half of the items that come up are Longshot scopes. They're popular- after all, they look sweet. And very tacticool…
  • Clip storage. Don't see it? That's because this gun is designed with functionality and realism in mind. The stock securely holds an extra clip (not included). And when it's not holding a spare clip, no-one will even see that it can…
  • Handle.   The. Best. Nerf handle. Ever.  It's universally comfortable; I can almost guarantee that you will feel like your hand just wants to hug that handle.
    It's like a Shrinky-Dink!
  • Modability. This gun is perfect for any skill level. You can literally do almost anything to this gun, and tons of companies make mod kits for any level of modification, making it even easier for you. Not to mention that it can figuratively "shoot lasers" when heavily modded.
  • Simple. Forget modding. Some Nerfers can't even figure out slam-fire. For those of you, the Longshot will be your dream. It's simple and intuitive; a baby could probably shoot it.
  • Collapsibility. It can shrink quite a bit without the clip or scope. And when you collapse the stock, it gets even smaller.
  • Bipod. Oh wait, they took that off. Never mind.
  • Z.E.D. Squad darts. They look like they've got built-in syringe with cc measurements! How cool is that?

That's a lot of good stuff, am I right?  But unfortunately there's also a couple cons.

Bad:
  • NO bipod. I'm a little put off by this. It's actually not the lack of a bipod that bugs me, per say. It's what's left over. Seriously, what is that?
  • Only one tac rail. Of course, the design was from back before tac rails were even a thing, but I still wish it had another rail. Maybe where the bipod used to be?  cough*redesign*cough...
  • Paint scheme. Teal and pale orange just doesn't jive with me. It's just not tactical or cool. Certainly not tacticool.

Well that's it. This powerhouse was hard to beat when it first came out, and it's still high up on the totem pole. It's well worth the price, especially if you want a good platform for a great mod. But Hasbro, if you're listening, please, please, put the bipod back on. Or just redesign it slightly with a tactical rail there instead. Please.


        ,,,,..
[˘˘˘˘7º''''''''''''''''''''

Monday, November 16, 2015

Nerf Zombie Strike Hammershot


The hammer-action revolver that changed the course of HVZ: the Zombie Strike Hammershot. A small, simple, and powerful Nerf sidearm with reasonable capacity and fine ergonomics. Not to mention a wood-inlaid handle and a "cloth-wrap" that is strangely symmetrical…

Zombies, have fear- your bane is here!

Good:
  • Size. Not too small, not too large; juuuust right. The Goldilocks of pistols.
  • One-hand prime. A hammer-action revolver is great for dual-wielding.
  • Snappy trigger. Very fun to use.
  • Handle. It's comfortable and grippy, with plenty of room for larger hands.
  • Bandolier attachment point. This is a sidearm, and as such it makes sense to attach a bandolier to the bottom of the handle.
    Ahh, so well-proportioned.
  • Tac-rail. Who puts tactical attachments on top of a revolver? ME!!!
  • Ranges. 95 feet is pretty good for a gun that doesn't even claim any ranges. And modded it can get various insane levels of performance.
  • Easy to reload. Just slip 5 darts in, smooth as butter.
  • Aesthetics. It looks pretty darn cool.

Bad:
  • Handle. Who will seriously look at the handle and think that's real wood? And the "cloth wrap", on top of being semi-pointless, neither looks nor feels remotely like cloth.
  • Not for small hands. The prime can be quite difficult for the little people. I'd recommend the Doublestrike for them instead.
  • Sporadic. Accuracy decreases exponentially the farther away from your target you are. Only effective for aiming at 40 feet or less. (Modding fixes this)

So there you have it. The good points far outweigh the bad if you're in it for the tacticool zombie-killing action. If you're a kid just looking for a fun toy to play with, I would recommend this, but with reservations. Know that it may be a bit too big for ease of use. But it is well worth the price.


And don't put a Stampede shield on top. It looks exactly as dumb as you'd expect.


        ,,,,..
[˘˘˘˘7º''''''''''''''''''''


P.S. I will not be doing an internal modification for this blaster. However, there might be a cosmetic mod coming soon… ;)

Tuesday, May 12, 2015

Painted Sidestrike

Nearly a month ago, I gave you a preview of a project I was working on. I apologize for taking so long; I actually was hoping to get this out to you only about a week and a half after leaving you in suspense over it. Anyway, here it is: the repainted Sidestrike.

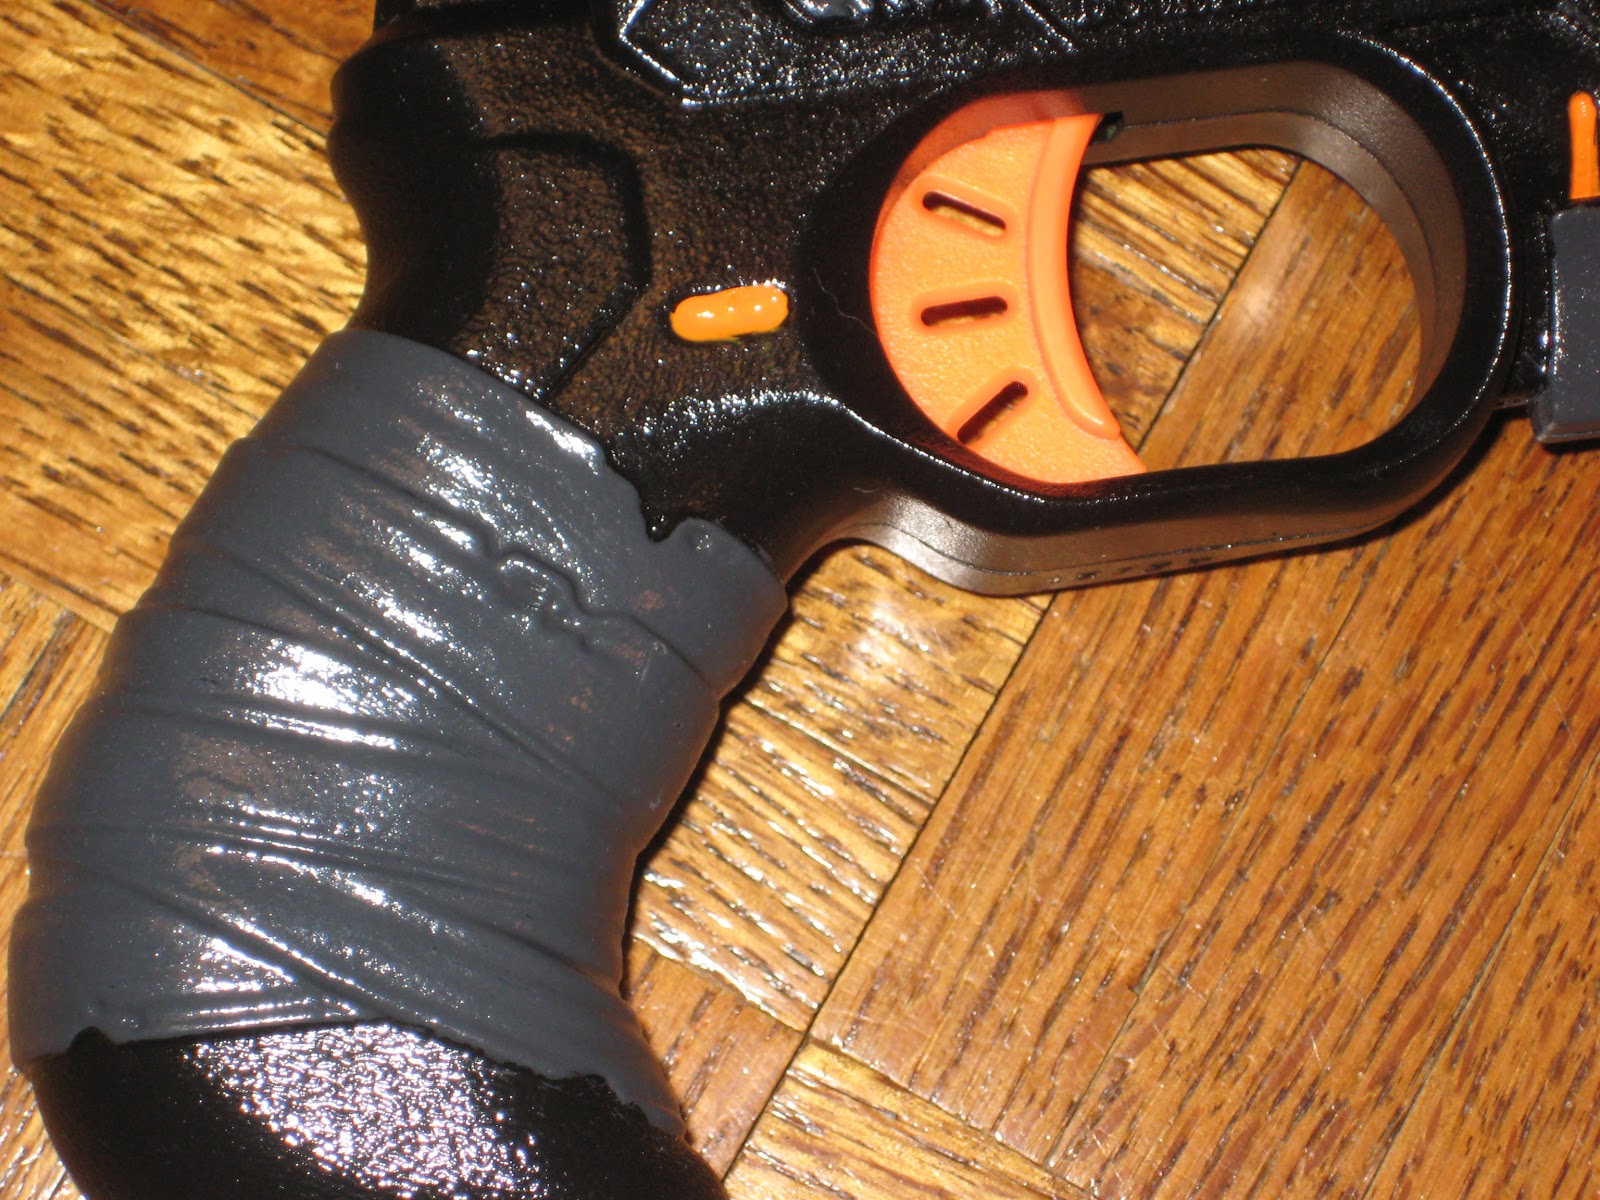
I never really was a fan of the green/light gray color scheme on the original (click here to see my review with pictures). I much prefer a simple stealth black and the regulation toy-gun orange for my nerf guns. For one thing, it makes night missions in nerf wars much easier. And all the orange is there for two purposes: a) I doubt anyone will have trouble recognizing that this is not an actual firearm, and b) it looks cool.
Mostly b.

So basically, I coated the main body pieces and the cocking slide with gloss black spray paint. I left alone the orange pieces and the handle insets. I did the orange detailing with acrylic paint, as with the bits of charcoal gray detailing. The handle insets received several coats of the orange acrylic paint. Then all the painted parts got a coat or two of satin finish top coat. The combination of the gloss black and the satin finish resulted in a really nice, tactical non-reflective texture (which, interestingly, also gives it a good feel in the hand). The top coat also means that the gun can get a bit beat up, without showing any wear on the paint job.
As usual, the little parts that were already orange stayed orange.

I didn't take a picture of it, but I also lightly dusted the holster with black spay paint for a shadowy look.

Detail of the handle.
My "signature", and a close-up of the
detailing on the Nerf logo.

Close-up of the cocking slide.


What do you think?

        ,,,,..
[˘˘˘˘7º''''''''''''''''''''


Tuesday, April 14, 2015

MOD: Nerf DoubleStrike

Finally, the Mod Guide for the Doublestrike!

Really, there's hardly anything you can do to improve the performance of the Doublestrike. You can't remove the air restrictors because of the "Smart AR" system it uses. You can't really upgrade the spring because it's already so tough. And there's no need to upgrade the seal, because it's already about as good as it gets. If you want to get better performance, here's LordDraconical's mod guide:

If you do want to take it apart for some reason, though (like to paint it), here's my input.

Difficulty: Easy
What you'll need: A phillipshead screwdriver.

1. Unscrew
There's seven silver screws to remove. They're all the same size, so you don't need to worry about which screw goes where. Keep them in some sort of bag or container, so you don't lose them.

2. Clamshell
Take the top half off and set it aside. Be careful that the little orange piece on top doesn't fly out.

3. Reassemble
Closeup of the internals
Assuming you have already taken out the internals and done whatever it was you wanted to do in the first place, here is how to put it all back together. Lay the trigger spring over the left metal post, then patiently place the trigger on that metal post so that the upright part of the spring fits into the tiny hole in the top of the trigger. That done, slide the spring over the cocking mechanism, slide the cocking mechanism/plunger into the barrel assembly, and arrange it all back into place. Then take the spring stopper and place it over the posts at the bottom of the handle such that it also fits over the spring.
The "shield"
Finally, place the "shield" piece (shown to the left) back over the pins to hold everything in.  Then place the tiny orange piece back under the tac rail, and lay the other half of the shell back on. And you're done.


        ,,,,..
[˘˘˘˘7º''''''''''''''''''''

Thursday, April 09, 2015

Painted Doublestrike

I like Black. Don't ask me why; I have no clue. I just know that I like Black.

Conveniently, Black happens to go very well with Nerf orange. One need only look to the Gear-Up series to prove this. Sadly, Gear-Up was discontinued, and most guns don't have an orange-and-black paint job. Let's fix that, shall we?
Pardon the fuzzy.

In my opinion, the Doublestrike never looked so good. And the nice thing is that it was very easy to paint, since all of the little pieces were orange. All I had to do was paint the shell.

Here's what I did:
1. Sand
I took the gun apart, then gave each half of the shell a good sanding prep. Drac has a good explanation of how to do this in most of his mod videos.

2. Spray Paint
I gave it several coats of gloss black spray paint. 'Nuff said.


3. Hand Paint
I gave it a cool detail job with a thin paintbrush and a few acrylic paints.
The "cloth wrap" handle


The orange parts
were all left orange.


4. Clear Enamel Coat
After the paint had plenty of time to dry, I took the shell back outside and gave it one or two coats of clear spray enamel. Let that dry, screw it together, and…

5. Voila!

Monday, March 02, 2015

Nerf Doublestrike


Here is arguably the most realistically styled nerf gun yet. And it has one of the most boring, ambiguous names for any nerf gun. That's Hasbro for you.

Honestly, I think the Doublestrike is pretty cool.

Please forgive me; my writing style is really off today, so I'm just gonna cut to the chase.

Good:
  • One-hand operation. While it takes getting used to, you can easily cock and fire this gun with one hand, which is rare with nerf guns.
  • Safe colors. Some of my readers may not live where toy guns have to have an orange tip. I do. As a safety precaution, Hasbro decided to make sure that everyone knows this gun is a toy by coloring half of it orange and the other half green.
  • Good for small hands. As I will cover later, this gun is designed to be a toy. Not an Hvz secondary, not a hold-up-the-bank weapon, just a toy. And since toys are usually played with by children with small hands, the design for this is intuitive.
  • Easy to spin. See video:


Bad:
  • Not for nerf wars. This gun is a poor choice to carry in a nerf war for several reasons:
    1. Low dart capacity. You're gonna have to reload this thing A LOT.
    2. Small handle. See that part of the handle that curves forward? It means that if your hand doesn't fit on the straight part, you will inevitably get a cramp holding it.
    3. No holster. There's nowhere to put this gun when you're not carrying it. It doesn't have a holster, no one makes a holster for it, and if you carry it in your pocket, you're likely to lose darts when you pull it out.
  • Realistic. You probably won't want to paint this very much, because it has high potential for being mistaken for a real weapon.
All that considered, this might be a good "kid's first gun" to teach firearm safety, or it might just be a fun toy to shoot your brother with. But if you participate in nerf wars and like the idea of this gun, just get a Hammershot, a Rebelle Sweet Revenge, or a Rebelle 4Victory. You'll like any of them much better.

I'll be giving you a mod guide for this one soon.


        ,,,,..
[˘˘˘˘7º''''''''''''''''''''

Sunday, February 15, 2015

Mod: Nerf Sidestrike

The long(ish)-awaited Mod Guide for the Nerf Sidestrike. All you need to do to get amazing range from this already great gun is improve the barrel seal and remove the air restrictor.

Difficulty: Easy
What you'll need: A phillipshead screwdriver and electrical tape (or plumber's tape).

Steps:
1. Unscrew
There are 2 screw sizes in this gun - medium and short. Eleven screws total; 8 medium and 3 short. The three short ones go here:            ------------------------------>
It is of note that you'll have to pull the slide back a bit to access one of the medium screws.

2. Clamshell
The gun comes apart into two easy halves. One has all the internals, and the other one doesn't have anything really. Also, keep track of the little orange piece on the tactical rail (it tends to fly out).
The half with the internals will look like this:
3. Remove Internals
First, carefully pull out the trigger system, being sure to not lose the catch spring. Set those aside. Then, pull the plunger tube/barrel system out. That's what you'll be working on.

4. Seal Upgrade
It is important to note that this step will make the gun slightly more difficult to cock.
Pull out the plunger rod. 
On the tip, there is a black O-ring. Take it off and set it aside. Make sure it doesn't get dirty, because that will ruin the seal. Now, take you electrical tape and carefully wrap a section around the area where the O-ring was. If you're using electrical tape, you'll only want to wrap it once. With plumber's tape, you might want to do 2-3 wraps of tape. After that's done, slip the O-ring back on over the tape. Re-insert the plunger into the plunger tube.

5. AR removal
The AR (air restrictor) is designed to restrict airflow, reducing performance. In order to remove it, you'll have to take apart the barrel assembly. That would be the big orange tube near the top of the gun. Take it out, and on each side you'll see a latch holding the front part to the back part. CAREFULLY unlatch those (If you're under the age of ten, I'd suggest that you ask your mom to do this), and take the assembly apart. The only part you want to remove is the actual AR and its spring (see photo).
Once you've done that, you need to make a decision. Are you going to want to fire Streamline darts with this gun? If yes, then you can pull out the dart post piece from the back. Then snap off the long, thin post from its base, and put the base back. From there, you can put the whole barrel assembly back together.

6. Reassemble
Put it all back together. See above picture for arrangement of all the internals.

And voila! You just added about 25 feet to the range of your Nerf Sidestrike!


        ,,,,..
[˘˘˘˘7º''''''''''''''''''''

Tuesday, February 10, 2015

Nerf Sidestrike


The ZombieStrike line of Nerf guns has included just about every type of gun, from the good to the gimmick. When I bought the Sidestrike, I figured it was a gimmick. After all, Hasbro has never made a gun that comes with a holster before this, and I assumed that the product that they were selling was more like a holster that happens to come with a gun.

I was wrong. This gun packs a punch, especially for its size. On top of that, it looks really cool, and comes with a holster to boot!

There's good and bad in every gun, so I'll sum it all up here:

Good:

  • Performance. The Sidestrike shoots reliably, accurately, and surprisingly far.
  • Looks. This is purely opinion, but I'm loving the styling on this gun.
  • Comfortable. It's small, yet large enough that my whole hand can fit on the handle. Also, the ergonomics are great!
  • Dart storage. In the holster, it stores up to seven darts. For such a compact gun, this is quite impressive.
  • Holster functionality. The gun fits smoothly and securely in the ambidextrous holster. On top of that, you can also use the holster with your Nerf Firestrike!
  • Paintability. Guns that come apart into multiple shell pieces are much easier to paint, and this one does.
Bad:

  • Tactical rail. If you look closely, there's a tacrail on the bottom of the gun. There's hardly any accessory that will ever fit on this thing, and even if there is, you couldn't use the holster. Hasbro didn't think this one through…
  • Green. Who wants a green blaster?
  • Connection system. Remember how I said the shell comes apart into several pieces? It does, provided you have really small, really strong fingers, and a boat load of patience.


Here's some pics:
The Sidestrike next to its holster

In the holster.


It's ambidextrous!!! For all you lefties out there.


For those of you out there who want to get better performance, the mod guide is here: http://tacticoolnerfer.blogspot.com/2015/02/mod-nerf-sidestrike.html.


        ,,,,..
[˘˘˘˘7º''''''''''''''''''''